![LaserStar Technologoes Logo-01.png]](https://26739.fs1.hubspotusercontent-na1.net/hub/26739/hubfs/LaserStar%20Technologoes%20Logo-01.png?height=40&name=LaserStar%20Technologoes%20Logo-01.png)
Disclaimer: The procedures described herein should be performed only by or under the supervision of specialized technicians. LaserStar is not responsible for damage to parts, equipment, or persons who attempt to perform any of these procedures without proper supervision or technical assistance, proper tools, or the safety measures necessary for handling lasers and high- and low-voltage equipment.
TOOLS NEEDED: Adjustable Wrench
SELECTING GAS:
First, select a tank of argon gas. Industrial-grade Argon Gas (99.99%) or higher can be used as a cover gas. Also consider tank size. (See Facts below †)
NOTE: When welding any metals that are oxygen- and/or Nitrogen-Reactive, or metals with high carbon content, Ultra High Pure (UHP) 99.999% pure Argon will yield better results and is highly recommended. (These include, but are not limited to, Titanium, Palladium, Nickel and all alloys containing Nickel.)
FACTS ABOUT ARGON GAS:
Argon is colorless, odorless, tasteless, and nontoxic as a solid, liquid, and gas. Argon is inert and forms no confirmed stable compounds at room temperature. Argon Gas is used as a shielding gas during welding, displacing oxygen and reducing or eliminating oxidation contamination in the metal or alloy.
† Since liquid Argon has a boiling point of -302.6°F (-185.9°C), and needs special equipment to hold it in liquid form, your Argon will be delivered to you in the form of a gas.
NOTE: Do not compare cylinder size to oxygen, as Oxygen will almost always be delivered in liquid form.
STORING GAS CYLINDERS
WARNING: Always use proper handling and storage procedures when handling and/or storing compressed gas cylinders.
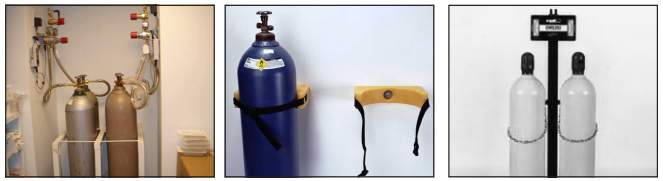
Store cylinders upright and secure them with a chain, strap or cable to a stationary building support (i.e. Structural Beam) or to a cylinder cart to prevent cylinders from tipping or falling. Examples of properly stored gas cylinders follow.
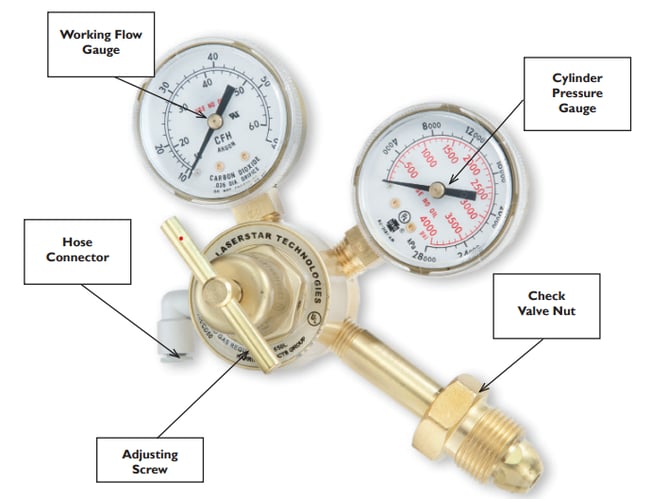
ARGON REGULATOR COMPONENTS
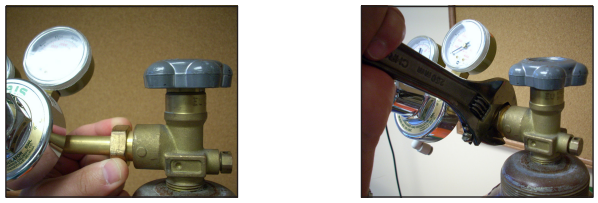
Remove Argon Regulator from its packaging and finger-tighten the threads of the regulator Check Valve Nut to the tank. Using an adjustable wrench, tighten the regulator Check Valve Nut until snug. NOTE: Teflon tape is not necessary.
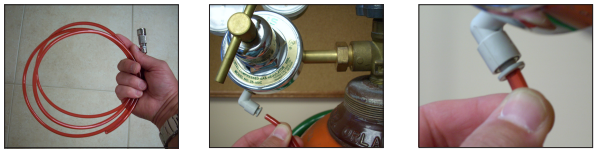
Select the Argon hose (provided with the laser) and push the open end into the plunger fitting on the regulator; make sure the hose is fully inserted. Pull on the hose to lock it into place inside the fitting.
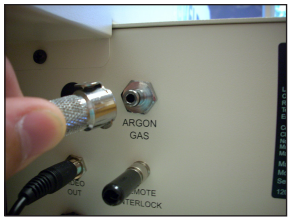
Plug the other end (quick disconnect) fitting into the quick disconnect nipple marked ARGON GAS located at the rear of the laser.
GAS FLOW ADJUSTMENT
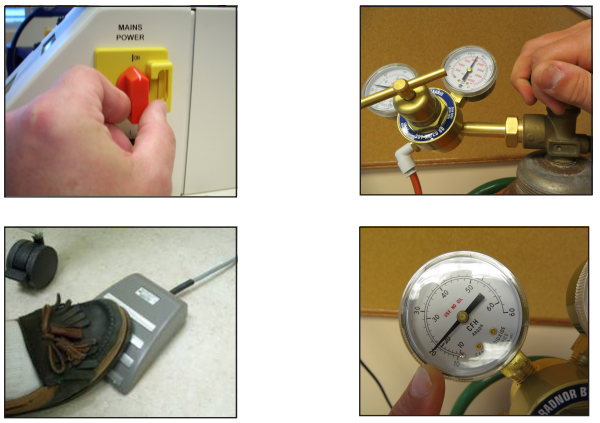
Turn on the Mains power (Red & Yellow) switch and the laser key switch. Open the gas tank and make sure the Cylinder Pressure Gauge shows a pressure reading. With the Laser Shutter closed, step on the foot pedal and look at the Working Flow Gauge. It should read 20 CFH (cubic feet per hour).
NOTE: The CFH reading is listed on the inside of the working Flow Gauge Dial.
If the reading is not 20 CFH, with the foot pedal down, turn the Adjusting Screw (Clockwise to increase the flow) or (Counterclockwise to decrease the flow). An acceptable flow reading is between 20 CFH and 25 CFH.
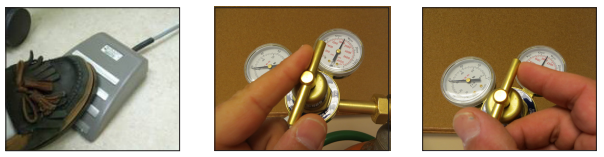
With the laser turned on and the Laser Shutter closed, cup your hand and place it at about 1” from the fixed brass Argon diffuser. Step on the foot pedal and feel the Argon flow. The flow should feel like a constant gentle breeze filling your hand with Argon Gas.
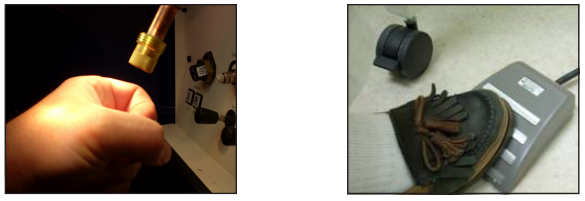
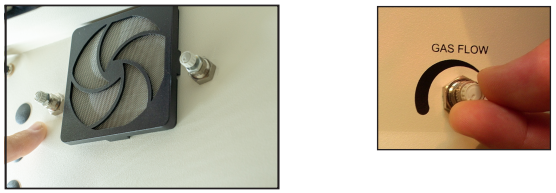
If you don’t feel gas flow, open the gas regulator valve inside the chamber counterclockwise (¼ turn at a time). If gas flow is excessive, turn the gas valve clockwise to close (¼ turn at a time) until you achieve proper gas flow.