Disclaimer: The procedures described herein should be performed only by or under the supervision of specialized technicians. LaserStar is not responsible for damage to parts, equipment, or persons attempting to perform any of these procedures without proper supervision or technical assistance, proper tools, or safety measures necessary for laser, high, and low voltage handling.
1. Power down and unplug machine, wait 10 min. for machine to discharge.
2. Remove top cover and left panel.
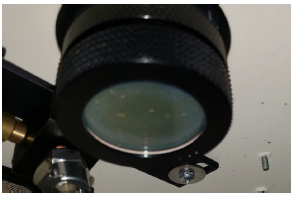
3. Remove scope.
4. Remove the Final Focusing Lens located inside the welding chamber.
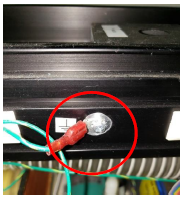
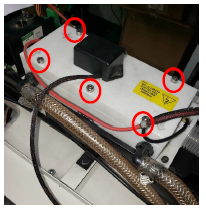
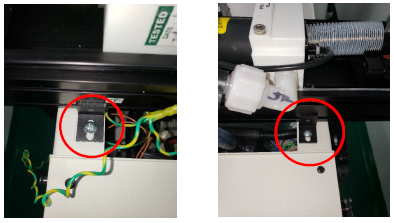
5. Remove the nut to disconnect the green/yellow ground wire from front left side of rail.
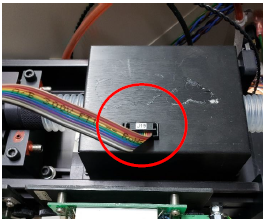
6. Remove the multi-color ribbon cable from the top of the beam expander box
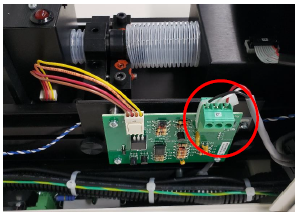
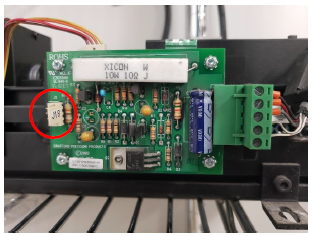
7. Remove the Green block connector from the Safety Shutter Controller Board located on the front, left side of rail.
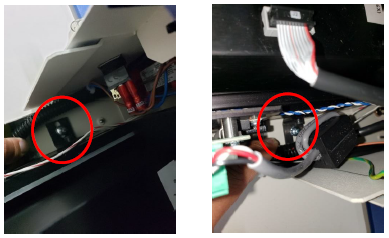
8. If the Laser uses a View Shutter board, disconnect the cable from the board
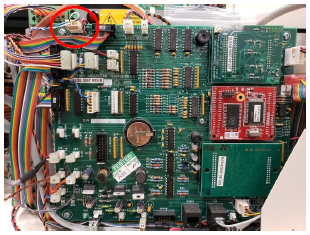
9. If you do not have a View Shutter Board, Disconnect the J18 View Shutter cable at the Control Board. It will require you to cut the wire ties
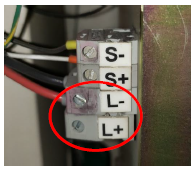
10. Unscrew the terminal screws marked L- and L+ and remove the large Black and Red wires on the left side of the Capacitor
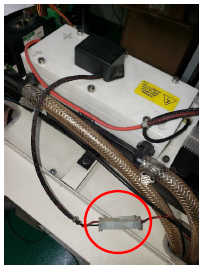
11. It may happen that the Red and Black cables of the lamp are attached to a connecting block on the Rail. Disconnect the bottom two at the connecting block

12. follow the green / yellow wire that comes with the red and black wires and disconnect it by removing the nut or pulling the connector with the red cover.
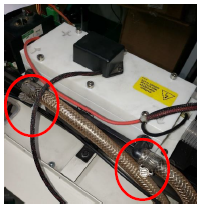
13. Follow the Black wire from the Black Trigger Transformer box on top of the White Flash Lamp Chamber and disconnect.
14. Unscrew but do not remove each of the six Allen screws on top of the pump gently open the cover to relive the pressure and drain the chamber. Retighten screws with equal pressure. Warning: Do not over-tighten these screws! Too much torque can cause damage to the Pump Chamber. If your chamber is a four-screw chamber, is the same procedure
15. With a flat head or Philips head screwdriver, loosen the two hose clamps from two hoses leading into the Pump Chamber
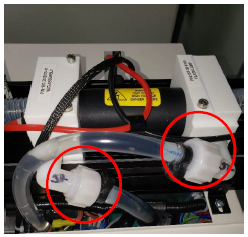
16. If the Flash Lamp Chamber of the Laser is of the new model, (See image below), just disconnect the hoses by loosening the water hose adapters
17. Remove the four Phillips screws that secure the Rail to the Laser chassis
18. Lift rail up and out of machine
19. Pack the rail (well) in a crate with plenty of cushion on all sides. Also, ship the Focus Lens with the rail (step 5)
Please review the article "Laserstar CRA Shipping Recommendations" for recommendations on shipping components for repair.