![LaserStar Technologoes Logo-01.png]](https://26739.fs1.hubspotusercontent-na1.net/hub/26739/hubfs/LaserStar%20Technologoes%20Logo-01.png?height=40&name=LaserStar%20Technologoes%20Logo-01.png)
Disclaimer: The procedures described herein should be performed only by or under the supervision of specialized technicians. LaserStar is not responsible for damage to parts, equipment, or persons who attempt to perform any of these procedures without proper supervision or technical assistance, proper tools, or the safety measures necessary for handling lasers and high- and low-voltage equipment.
A digital voltmeter is needed to perform this test.
Identify the 24 VDC supply in your laser. The location of the 24 VDC Power Supply may vary by model and generation. G1 lasers use a different Power Supply, and fault identification differs from that described below. If your laser is G1, we suggest contacting Service for troubleshooting assistance.
The 24 VDC referred to in this article is the one shown below.
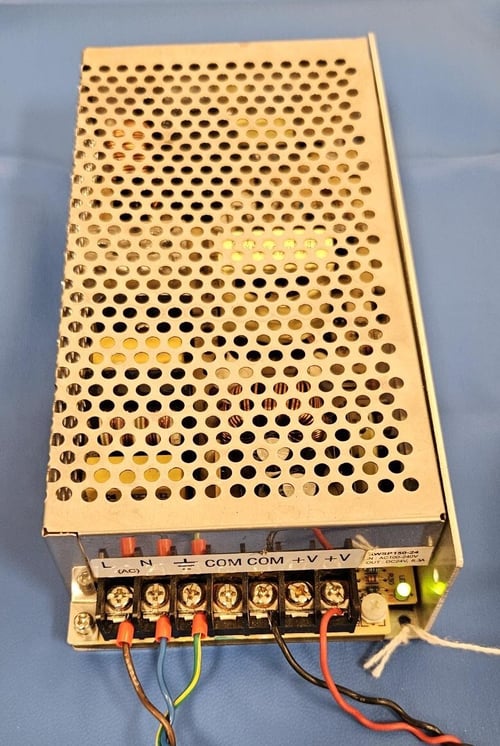
Once identified, turn on the laser and check that the green LED lights up. If the green LED does not light up, a voltmeter is required.
Identify the AC voltage input of the 24 VDC supply. The 24 VDC Power Supply is shown below. (L=Line, N=Neutral,  =Ground)
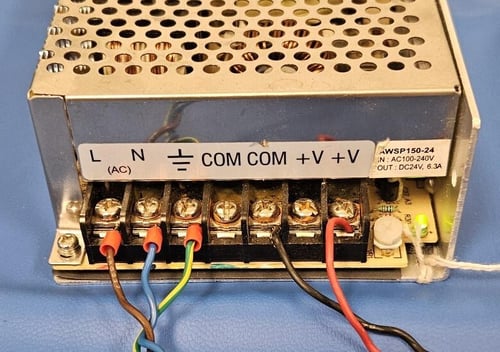
Select the AC voltage on the voltmeter on the 600 V scale. Touch the screw on the Line (L) with the red voltmeter tester and the screw on the Neutral (N) with the black voltmeter tester. You should receive an AC voltage reading equal to the laser's AC input; for example, if your laser is 120 VAC, the reading will be 120 VAC (+/- 2-4 VAC). If the laser, on the other hand, is 220 V, the reading should be 220 V (+/- 2-4 VAC).
If the voltmeter does not show an AC voltage reading, the current is not reaching the 24 VDC Power Supply. We suggest checking that the laser receives the input voltage. Check the fuses, power cord, and outlet.
If input voltage is present, the next step would be to disconnect all components connected to the 24 VDC Power Supply. Turn off the laser and disconnect all red and black wires connected to the 24 VDC supply. Turn on the laser and check if the green LED lights up.
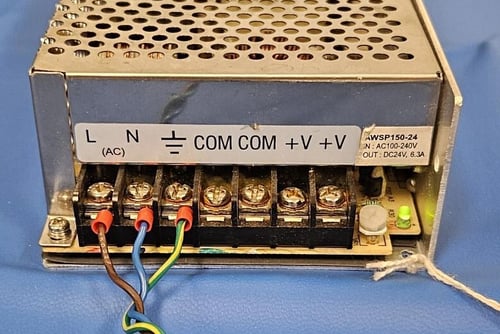
If the LED lights up, check that there is 24 VDC on the output of the 24 VDC Power Supply. Select the DC voltage on the voltmeter and, just as you did for the AC voltage, tap the red tester labeled "+V" and the black tester on "COM". A reading should appear on the 24 VDC (+/- 2 VDC) voltmeter.
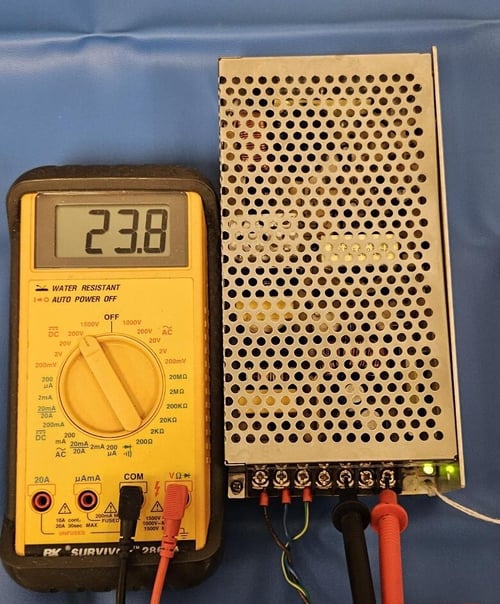
If no reading is present, the 24 VDC supply must be replaced.