![LaserStar Technologoes Logo-01.png]](https://26739.fs1.hubspotusercontent-na1.net/hub/26739/hubfs/LaserStar%20Technologoes%20Logo-01.png?height=40&name=LaserStar%20Technologoes%20Logo-01.png)
Disclaimer: The procedures described herein should be performed only by or under the supervision of specialized technicians. LaserStar is not responsible for damage to parts, equipment, or persons who attempt to perform any of these procedures without proper supervision or technical assistance, proper tools, or the safety measures necessary for handling lasers and high- and low-voltage equipment.
Check the system’s water flow to confirm the pump is working.
- Laser 220VAC or Three-phase:
- For 220VAC or Three-phase lasers, you must check that the correct voltage is reaching the laser.
- If the input line has the correct voltage, check the fuses on the back of the laser. Do not visually inspect the fuse; use a voltmeter to test for continuity across it. See the article How to test Fuses with a Digital Voltmeter
- For 220VAC or Three-phase lasers, you must check that the correct voltage is reaching the laser.
- Machine with By-Pass Valve (G1, G2 Pedestal Series, 2000 Series):
- At the top of the water bottle, follow the hose to the By-Pass valve, with the hose returning to the water bottle
- Turn the valve and verify that there is water flow into the bottle
- Make sure no hose is kinked
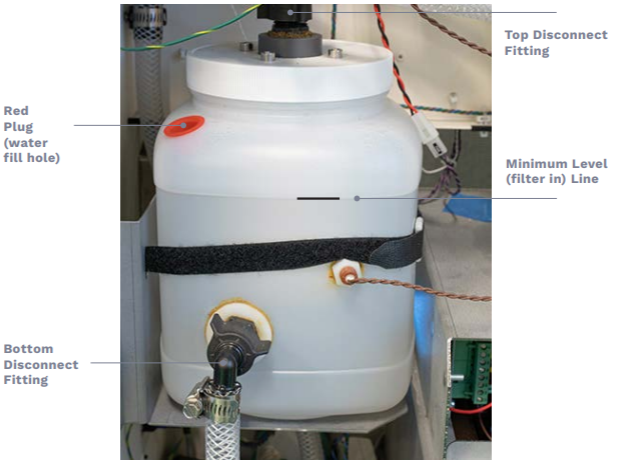
- Disconnect the Top and Bottom hose Press & Pull and reconnect them until you hear a "Click"
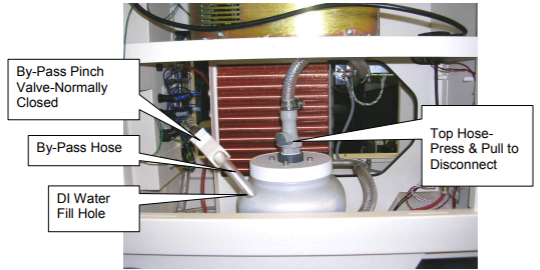
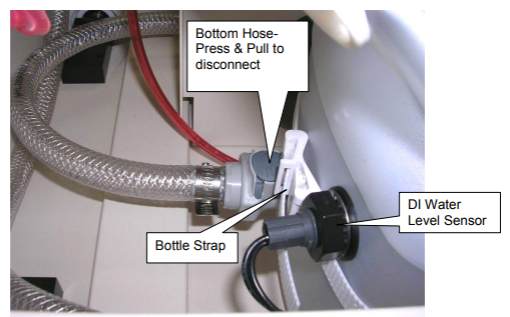
- Without By-Pass Valve:
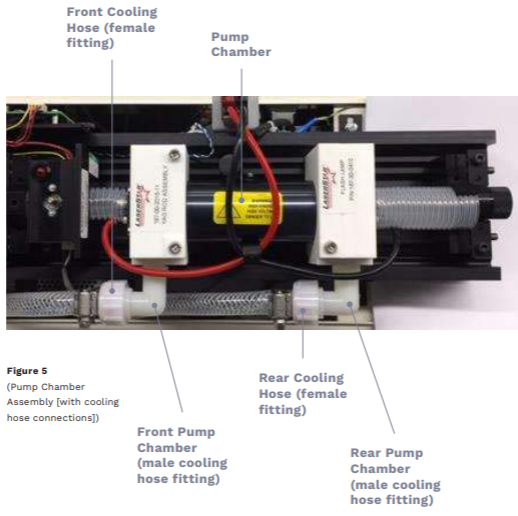
- To check for trapped air in the cooling system, pinch and hold the rear cooling hose at the Flash Lamp Chamber for 10 seconds. Then inspect the water line for air bubbles.
- Repeat the procedure until no air remains in the water line.
- On the Laser G4 and G5, if air still exists in the line, make sure the Front and Rear Cooling Hose are properly adjusted.
- Check that the water container connections are tightened properly to prevent air from entering.
Use the jumper only as a temporary troubleshooting tool. Do not operate the laser while the jumper is connected to the Control Board, including at J34. LaserStar is not responsible for damage resulting from operating the laser with the jumper installed at J34.
If the water line is free of air bubbles but the problem persists, proceed to the J34 connection on the Control Board. Locate the pins labeled J34; a purple wire should be connected at this location
Control Board G1, G2 and G3

Control Board G4, G5
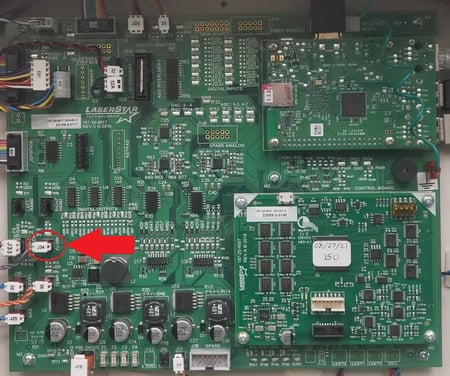
Obtain a two-pin jumper from the Troubleshooting Jumpers Kit, which is typically kept near the Control Board.
Disconnect the cable at J34 from the Control Board and place one Black Jumper Cap on the pins at J34.
Turn ON the laser. Check if the message no longer appears.
- The message appears: "Control Board Faulty."
- The message does not appear = Flow Valve: Faulty or irregular water flow in
the System
If your water filter is older than 6 months, replace it.
If your laser is the benchtop version, check that there are no obstructions in the water container outlet.
- Drain the water from the system.
- Remove the water filter.
- Look inside. The interior of the Water Bottle must be clean and
without any residue. - If you find debris inside, remove the water bottle to clean it.
- Use a soft-bristle brush to clean the water bottle's inner screen.
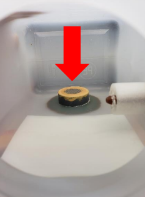
If the Water Pump is noisy, replace the Mag Drive, water, and water filter.
Once you have checked all previous steps and the problem persists, contact service for technical assistance.
Was This Article Helpful?
Please take our survey and share your feedback.
Do you still need help?
If you need our assistance with your issue, please get in touch with our customer support team at (1) 888-LST-SRVC (578-7782). If you're looking for support outside of our regular business hours, please leave a voice message or send an email to service@laserstar.net